Our Newsletter
Sign up for our e-mail newsletter and stay informed for what’s next on the horizon.
Just as we were about to share some insights on preserving optimal PC performance, it’s a fortunate occurrence that the topic of installing computer cooling systems has arisen.
We’ve simplified a user-friendly, step-by-step guide to assist you through this seemingly intricate process. While the steps are uncomplicated, each one is vital in making sure your computer operates cool and delivers its best performance.
So, are you prepared to plunge into this temperature-reducing adventure and learn how to keep your system cool under pressure? You’ll be surprised how uncomplicated it can be!
We’ve walked you through the 11 key steps for setting up computer cooling systems.
Take into account, studies suggest that overheating is responsible for 55% of all system breakdowns. Therefore, be patient and pay close attention to the finer points.
A correctly set up cooling system not only protects your hardware but also boosts your system’s efficiency.
Accomplishing this task accurately can save you a considerable amount of time, money, and frustration in the long run.
To fully grasp the subtleties of computer cooling systems, it’s important to recognize that air coolers employ heat sinks and fans to cool the CPU by letting heat escape, while liquid coolers use coolant and a pump to direct heat away from the CPU. These strategies aim to keep a safe thermal operating environment for the CPU, a crucial component of the motherboard.
In the case of air coolers, we attach them directly to the CPU, with thermal paste filling the tiny gap between the two to promote heat transfer. The heat sink, typically constructed of metal with high thermal conductivity like copper or aluminum, soaks up the CPU’s heat. Fans connected to the heat sink then disperse this heat, regulating the CPU’s temperature.
Conversely, liquid cooling systems function on a slightly different principle. A pump moves coolant through tubes that link the CPU, a radiator, and a fan. The CPU’s heat raises the temperature of the coolant, which then journeys to the radiator. The fan cools the warmed coolant before it’s circulated back to the CPU.
Choosing the appropriate cooling system starts with understanding the type of your CPU and its workload, which will guide you in deciding whether an air cooler or a liquid cooler is the superior choice. Whether you’re fitting a cooling system on an AMD or Intel CPU, taking into account the quantity of heat produced by your processor’s activity is vital.
For an in-depth, technical analysis, consider:

Before proceeding to the actual setup process, it’s crucial to adopt some critical safety precautions to shield both the user and the hardware. Initially, we should put on an ESD anti-static wristband. This measure wards off static electricity that could damage the motherboard or CPU socket. Ignoring this step could result in system malfunctions, so it’s vital not to skip this.
Subsequently, we need to disconnect the computer from its power supply. This action mitigates the possibility of accidental shock or short-circuiting. We’re handling sensitive electronic components; averting electrical mishaps protects our hardware and confirms our safe operation freedom.
At this point, let’s ascertain the CPU brand and socket type. This knowledge is critical as CPU coolers aren’t universally compatible. Having this information early on assists in simplifying the setup process and dodging potential damage.
Reviewing the CPU cooler’s manual is also of utmost importance. It offers specific directives, verifies compatibility with our system, and instructs us on the appropriate use of thermal paste, which enhances air flow.
If we’re substituting stock coolers, the manual also provides insights on whether the mounting bracket on the motherboard requires a replacement. Occasionally, installing aftermarket CPU coolers demands different brackets. By adhering to these pre-setup safety measures, we’re preparing ourselves for a successful and secure setup process.
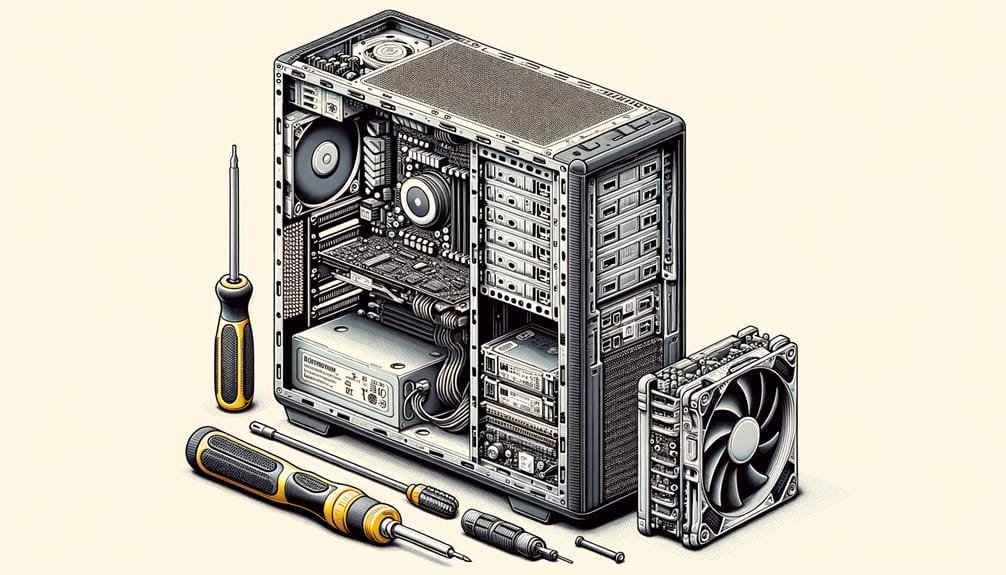
Let’s assemble our necessary tools, such as thermal paste, a screwdriver, the pertinent mounting hardware for the cooler, and an ESD anti-static strap. These tools will help to ensure a streamlined, effective installation while reducing potential problems.
With our tools prepared, it’s crucial to verify the suitability of our chosen cooler with the CPU socket type. This step is necessary to prevent any installation hiccups later. This information is typically found in the product’s manual or on the manufacturer’s website.
Next, assemble all components required for the cooler installation. Review the manual for a list of what’s needed. It’s a valuable reference to guide us through the installation procedure.
For a visual representation of these steps, here’s a quick summary:
Once we’ve our equipment ready and have verified the suitability of our cooler, we can proceed to cautiously disassemble our PC to make room for the new cooling system. Initially, we’ll disconnect every power source to maintain safety. This involves unplugging the PC from the socket and detaching peripherals.
Then, we’ll detach the side panels of the PC case. This provides us with convenient access to the interior components, including the CPU, fans and radiator, and the fan connector. Pay attention to where each component is located as we’ll need to put them back after installing the CPU cooler.
Our primary focus here will be the CPU coolers. We must take them off with caution to avoid causing any harm. During this phase, we’ll also remove the old thermal paste, which plays an essential role in heat transfer. Don’t stress, we’ll be applying fresh thermal paste later.
Proceeding to the cooler installation preparation, we need to ascertain we have the right mounting hardware that aligns with our CPU socket type. This detail can be found in the cooler manual. If it’s not, a swift search online should aid. Bear in mind, not all CPU coolers are suitable for all motherboards. The appropriate fit guarantees optimal heat dispersion and CPU durability.
Subsequently, we need to clean the CPU and cooler surfaces. Our suggestion is to use isopropyl alcohol for this task. It’s essential to have a clean, residue-free surface for the cooler to make optimum contact with the CPU.
The compatibility of the CPU cooler with the dimensions of your PC case is also crucial. A cooler that doesn’t fit well can hinder airflow or even harm your components. Always double-check these measurements prior to installation.
To assure effective cooling, we need to confirm the orientation of the CPU cooler. This ensures that air is directed in the right direction, across the motherboard and out of the case.
Here’s a quick checklist:
With the right preparation, we’ll assure a seamless and efficient cooler installation.
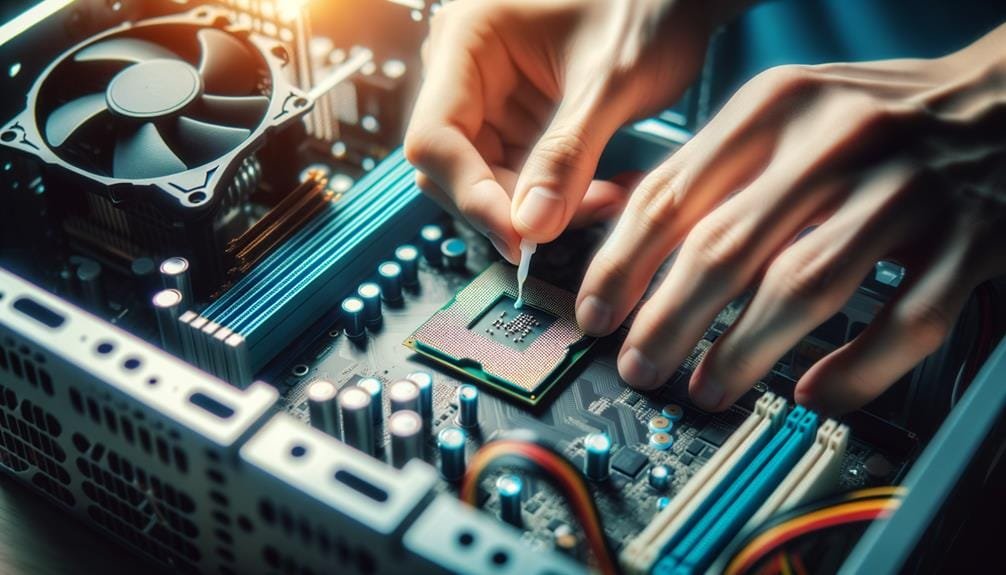
Next, we’ll handle the important step of applying thermal paste, which significantly boosts heat transfer between the CPU and the cooler. The thermal paste’s main function is to fill microscopic gaps between the two, amplifying contact and heat release.
Here’s a simple guide to applying thermal paste:
| Step | Instruction |
|---|---|
| 1 | Clean the CPU surface with isopropyl alcohol. |
| 2 | Apply a small bead-sized amount of high-quality thermal paste in the CPU’s center. |
| 3 | Refrain from spreading the paste. The cooler’s pressure will distribute it evenly. |
| 4 | Exercise caution not to apply excessive paste. Surplus can lead to poor heat release. |
| 5 | Securely attach the cooler on top of the CPU. |
It’s critical to use a premium thermal paste to optimize heat transfer efficiency. Keep in mind, the key is balance. Insufficient paste won’t give optimal heat transfer, but an excess can result in potential overheating. By adhering to these steps, you’ll ensure your CPU maintains an effective heat release, permitting you to extend your machine to its limits without the worry of overheating.
Now, we’ll progress to the vital stage of fitting the CPU air cooler.
We’ll initiate with getting ready for the installation, concentrate on accurately mounting the cooler, and ultimately, linking the power cables.
It’s crucial to adhere to these steps meticulously to guarantee effective cooling of your system.
Before we move forward with the fitting of the CPU air cooler, let’s make sure we’ve the appropriate mounting backplate or retention clips that match the cooler. This step is vital for a successful cooler installation.
Here’s a brief guide to get ready for installation:
Correct installation guarantees excellent performance and durability of your system.
Once we’ve thoroughly prepared for the installation, it’s time to move forward with setting up the CPU air cooler, a crucial step in tuning our computer’s performance.
Our preliminary task is to coordinate the CPU cooler’s mounting backplate or retention clips with the motherboard socket type. Subsequently, we’ll smear thermal paste onto the CPU, positioning a small amount in the middle of the processor to guarantee effective heat transfer.
Then, we’ll fasten the CPU cooler using spring screws or metal loops, applying uniform pressure on the thermal paste for optimal cooling effectiveness. The direction of the fan is crucial, thus we’ll direct the cooler’s fan to blow towards the left side of the motherboard, promoting better airflow.
Lastly, we need to verify the installation of extra fans and keep an eye on the CPU temperature, ensuring it stays within safe limits.
Often, the subsequent vital phase in setting up a CPU air cooler is to correctly link the CPU fan wire to the dedicated CPU fan header on the motherboard, securing a steady power source. This action is fundamental in the set up of cooling systems, notably in CPU coolers that rely on thermal paste for optimal heat transfer.
Here’s a brief summary:
Let’s proceed with the process of installing the CPU liquid cooler, a vital component that employs a radiator, fans, and a pump to efficiently cool down your CPU. Frequently selected for overclocked systems, liquid coolers are a blessing for high-performance computing, providing superior cooling capabilities.
To start, we’ll apply a layer of thermal compound to the CPU. This compound improves the heat transfer from your CPU to the cooler. After this, we’ll mount the pump, which circulates the liquid coolant, soaking up the heat directly from the CPU.
Then, we’ll fit the radiator. This piece is responsible for dissipating the heat gathered from the CPU by the liquid coolant. The larger the radiator, the better the cooling, so choose a size that aligns well with your system case.
The fans, connected to the radiator, play a vital role in cooling the liquid. They blow air through the radiator, aiding in cooling the liquid before it’s pumped back to the CPU.
Lastly, accurate positioning is crucial for optimal cooling. Ensuring the fans and radiator are correctly oriented will allow for the best airflow and cooling capacity. There you have it, your CPU liquid cooler is ready to maintain those temps down!

Next, we’ll attentively connect the CPU cooler’s fan cable to the CPU fan header on the motherboard, making sure it’s adequately powered. This is a vital step in assembling computer cooling systems. After all, it’s not just about applying thermal paste and installing CPU coolers. Powering these systems is fundamental.
The power supply to your CPU cooler is an integral component that mustn’t be ignored. Here’s our action plan:
With the power connections securely in place, we’re ready to move on to the crucial stage of testing the new cooling system. It’s of utmost importance that we keep track of CPU temperatures with software like HWMonitor or Core Temp, both prior to and following the installation of the cooling system. This will provide us with a distinct comparison to verify the effectiveness of the new system.
Following this, we’ll conduct stress tests with tools such as Prime95 or AIDA64. These mimic intense CPU loads, pushing the cooling system to its maximum capacity. Our goal is to ensure that the system can manage the heat in these extreme scenarios.
Besides tracking temperature, we need to be alert for strange noises or vibrations. Any significant change could indicate a potential issue. We’ll also monitor the fan speeds closely, making sure they’re operating at the right RPM for optimal cooling.
Our final step will be to visually check for any signs of coolant leaks, a potential indicator of system failure. Unusual temperature increases can also signal a problem.
We’ve guided you through the 11 principal steps to install computer cooling systems.
Keep in mind, research indicates that overheating contributes to 55% of all system failures. Therefore, take your time and be meticulous about the details.
A properly installed cooling system not only safeguards your hardware but also amplifies your system’s performance.
Executing it correctly can spare you a significant amount of time, money, and annoyance in the future.