Our Newsletter
Sign up for our e-mail newsletter and stay informed for what’s next on the horizon.
Imagine a PC case that’s not just a box safeguarding your hardware, but a canvas expressing your individuality, aesthetics, and ingenuity. We’ve all witnessed those monotonous, standard computer cases, but why opt for ordinary when you can fabricate something extraordinary?
It’s about moving that step from practical to unique, transforming the commonplace into the splendid. We’re discussing more than just applying a layer of paint; it’s about comprehending the process, selecting the correct tools, and making informed decisions.
Prepared to commence on a journey to design a PC case that’s distinctly yours?
We’ve navigated the intricate steps of PC case transformation, expertly wielding our tools and lively paint. Now, our once standard PC case radiates individuality, a phoenix rising anew.
Let’s revel in the results of our adept work, and appreciate the splendor of our custom-made masterpiece.
Keep in mind, maintenance is key to preserving this piece of art. So, let’s maintain our freshly transformed PC case in a clean and functional state, a testament to our technical prowess and artistic vision.
Before we proceed with modifying your PC case, it’s important to first study the size, form factor, cooling capabilities, cable management choices, material quality, and comprehensive aesthetics of your existing arrangement. The size and form factor of your PC case are crucial to ensure compatibility with new components. We’re not solely referring to physical measurements; it’s necessary to consider the arrangement and how it houses your present hardware.
Adequate airflow and cooling capability in your PC case are vital to achieving top-notch performance. It’s important to examine the number of fan mounts, their positioning, and the general ventilation of your case. These observations can assist us in pinpointing potential restrictions and enhancing your system’s durability.
We’ll also analyze the cable management possibilities in your current configuration. A messy case can obstruct airflow and complicate future upgrades. It’s important to study the area and design for improved cable organization. Additionally, we’ll assess the material quality of your PC case. Superior materials can provide robustness and longevity, giving your PC the resilience to endure daily usage.
Now, let’s focus on the preparation phase of your PC case transformation.
We’ll look into:
It’s all about meticulous preparation and clear foresight, ensuring your upgraded case doesn’t just look fantastic but operates flawlessly.
Deciding on the ideal material for our PC case modification hinges on the desired look and functionality. Acrylic is a favored material due to its see-through quality and ability to be customized. Its transparent nature provides a distinct view into the internal mechanics of your setup.
| Material | Benefits |
|---|---|
| Acrylic | See-through quality, Customization |
| Metal | Robustness, Sleek appearance |
| Wood | Distinctiveness, Natural feel |
However, don’t restrict your options to just acrylic. Metal, with its robustness and sleek appearance, or wood, lending a distinct and natural feel, could also be suitable options. Reflect on the overall theme of your setup and personal tastes. It’s critical to examine each material’s characteristics to secure it fulfills your needs. Ultimately, the liberty of choice is our guiding tenet.
Having chosen the ideal material for our PC case, we’re now focusing on the design and aesthetics to give it a personal touch. We should contemplate about color combinations and design features. Whether we decide on a simplistic style or a more intricate design, it’s important to ensure it fits with our total vision.
The appearance of our PC case can be personalized through color application, stickers, or other alterations. The side panel, for example, could have a distinctive design or a transparent section to display the inside parts. We should also take accurate dimensions to evaluate the space we’ve for any extra features or parts.
Detailed investigation into various design sources can assist us in crafting a distinctive and personalized appearance.
Before we begin the practical transformation of our computer housing, it’s crucial to form a distinct idea of the end result, including the design, color scheme, and theme.
Take into account the current components, such as the air cooler, and the layout to guarantee they’re compatible with the transformation. This demands accurate measurements and attentive record-keeping.
We advise studying different painting methods and supplies to achieve the look you desire. Formulating a step-by-step strategy for taking apart, painting, and reassembling the computer case can prevent mistakes or oversights.
Keep in mind, this process allows for artistic expression, yet requires technical accuracy. The process of turning your computer case into a one-of-a-kind work of art begins with meticulous planning and concludes with careful execution of each stage.
Before we get into the complexities of PC case modification, it’s crucial to assemble the appropriate tools for the task, from standard ones like screwdrivers and pliers to more unique equipment such as a Dremel rotary tool and heat gun. For particular tasks like setting up a CPU cooler, precision is paramount, necessitating tools such as calipers and rulers.
Here’s the catalog of basic tools you’ll need:
These are the fundamentals, but bear in mind, tools can vary depending on your specific mod, so remain flexible. Now, you’re armed with the information to select the appropriate tools for your PC case modification journey. Let’s proceed to personalize your PC.
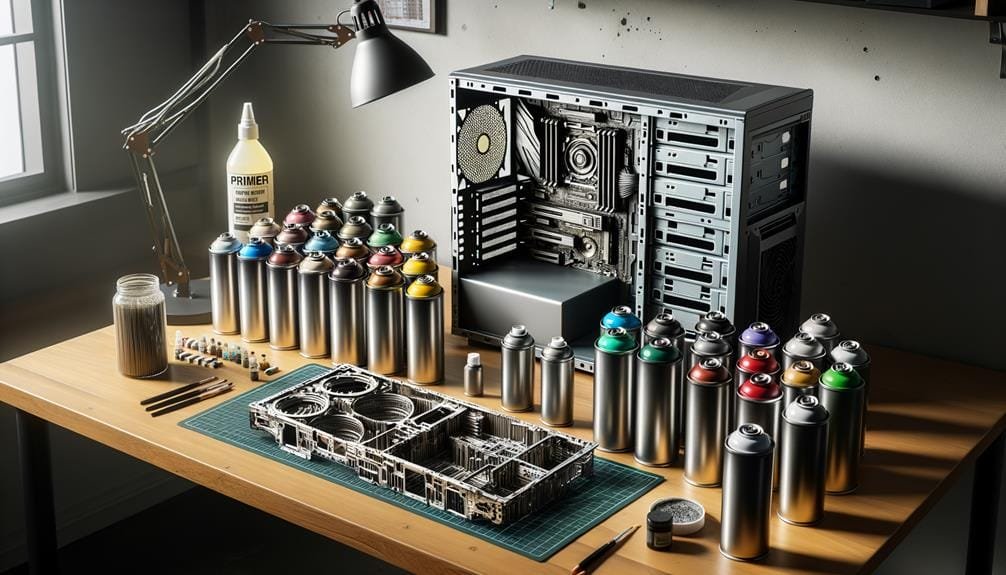
After gathering all the necessary equipment, the next crucial step in modifying your PC case involves selecting the appropriate paint. The decisions we make at this stage will significantly influence the visual appeal and durability of our project.
We suggest using acrylic paint because of its straightforward application process and ability to withstand wear and tear on PC cases. Choose a paint that has been specifically developed for metal surfaces to guarantee proper sticking and prolonged lifespan. Matte or satin finishes tend to be favored as they give a clean, contemporary appearance. For those who desire a little extra pizzazz, metallic paints are an option. These can contribute a distinct and attractive finish to your PC case, mirroring both your personal style and character.
However, the significance of conducting a trial run can’t be overstated. Apply your selected paint to a small, hidden part of the case first. This will enable you to verify its suitability and ensure the outcome is precisely what you’d in mind. The focus here is on personal expression, hence it’s vital to set ourselves up for accomplishment right from the get-go. With the appropriate paint, your PC case makeover will indeed be impressive.
Let’s immediately begin with the detailed process of painting your PC case, making sure that every component receives enough coverage for a sleek, professional finish. We’re going to guide you through the process, acknowledging your wish for autonomy and originality in this DIY endeavor.
With these steps, we’re prepared to start painting. Remember, taking your time in each step will contribute to a more professional finish. The power to modify your PC case is in your hands, let’s make it cooler than ever!
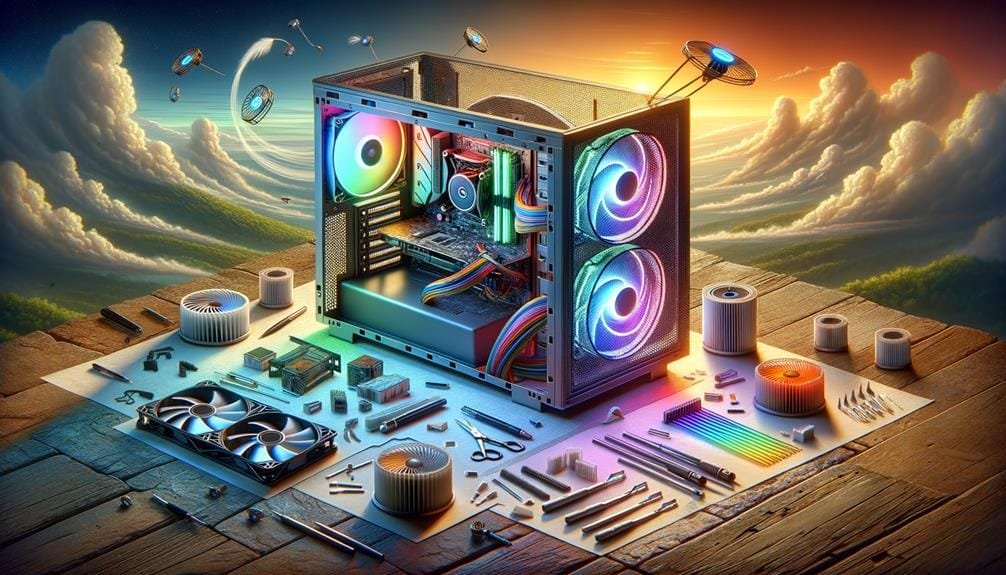
After successfully giving your PC case a fresh coat of paint, we can now add features to increase its practicality and aesthetics, such as RGB lighting strips, cooling systems, tempered glass side panels, cable management solutions, and personal decorations.
To start off, if you like a lively visual, think about installing customizable RGB lighting strips. High-quality options are available from brands like ASUS ROG that can significantly transform your case’s aesthetic.
Next in line is to think about ameliorating the airflow and temperature regulation inside the case by attaching more cooling fans or liquid cooling systems.
Switching to a tempered glass side panel is another considerable improvement. It not only gives a modern look but also displays your components. To keep things neat and for better airflow, incorporating cable management solutions like Velcro straps or cable combs is a good idea to keep your wires in check.
Lastly, to give a personal and unique flair to your PC case, think about adding custom decals, vinyl wraps, or even laser etching. Whether it’s a logo of a game you enjoy or a design that mirrors your personality, this final touch can make your PC genuinely yours.
With your PC case now transformed, it’s crucial we focus on its maintenance, ensuring it stays both functional and visually appealing over time. Proper upkeep is an important step in protecting the longevity and performance of your tailored PC case.
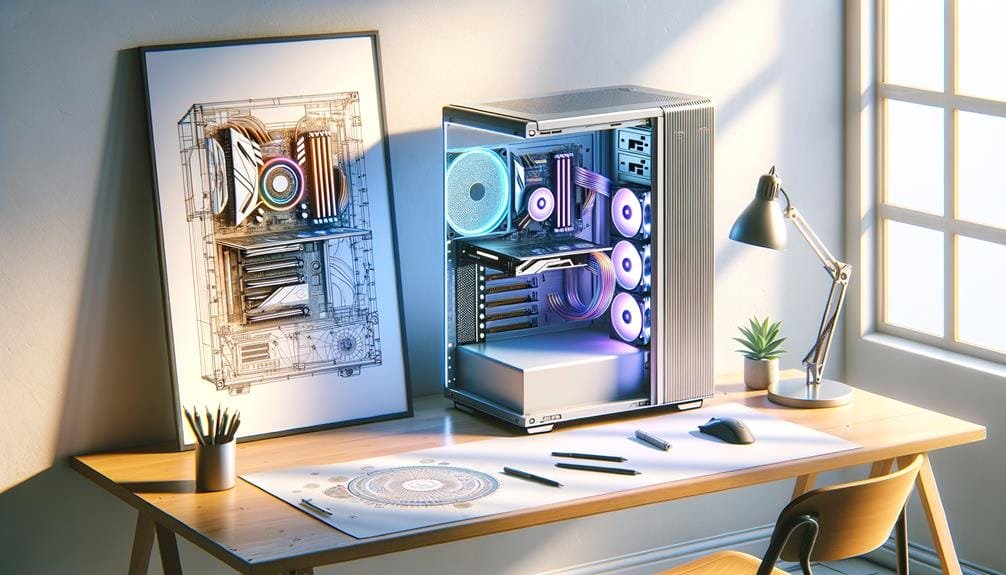
After ensuring the durability of your revamped PC case through careful upkeep, we now focus on the thrilling endeavor of displaying your personalized creation. Place your PC in a space that’s well-illuminated, allowing the distinctive features to stand out.
You might want to use a transparent acrylic side panel, which will display the internal parts and illumination effects in all their glory. Boost the overall appearance with matching accessories. LED strips, cable management tools, and custom decals can considerably augment the visual appeal.
Now, don’t keep this beauty all to yourself. High-definition images of your masterpiece posted on social media or PC enthusiast forums can motivate others and attract well-earned appreciation for your handiwork.
However, if you’re aiming for a wider audience, you might want to think about entering PC case modding competitions. This not only gives you a stage to display your creativity, but it also links you with people who share the same interest and appreciate the expressiveness and individuality a personalized PC case embodies.
We’ve journeyed through the complex process of PC case transformation, skillfully using our tools and vibrant paint. Now, our once ordinary PC case exudes originality, a phoenix reborn from the ashes.
Let’s take pleasure in the outcome of our skillful work, and admire the brilliance of our personalized creation.
Remember, upkeep is vital to keeping this work of art intact. So, let’s keep our newly transformed PC case clean and operational, a symbol of our technical expertise and artistic imagination.